Most cookies and trackers are automatically detected and blocked by Secure Privacy's blocking engine. However, certain cookies may not be blocked automatically due to specific website setups or non-standard script configurations. This guide explains how to identify unblocked cookies in your scan report and configure manual cookie blocking using Secure Privacy's Tag Blocking feature.
Who Is This For?
Website administrators and developers identifying and resolving cookies not blocked automatically by Secure Privacy
Compliance teams verifying that all non-essential cookies require prior consent before loading
Implementation teams configuring tag blocking for scripts, pixels, and iframes not covered by auto-blocking
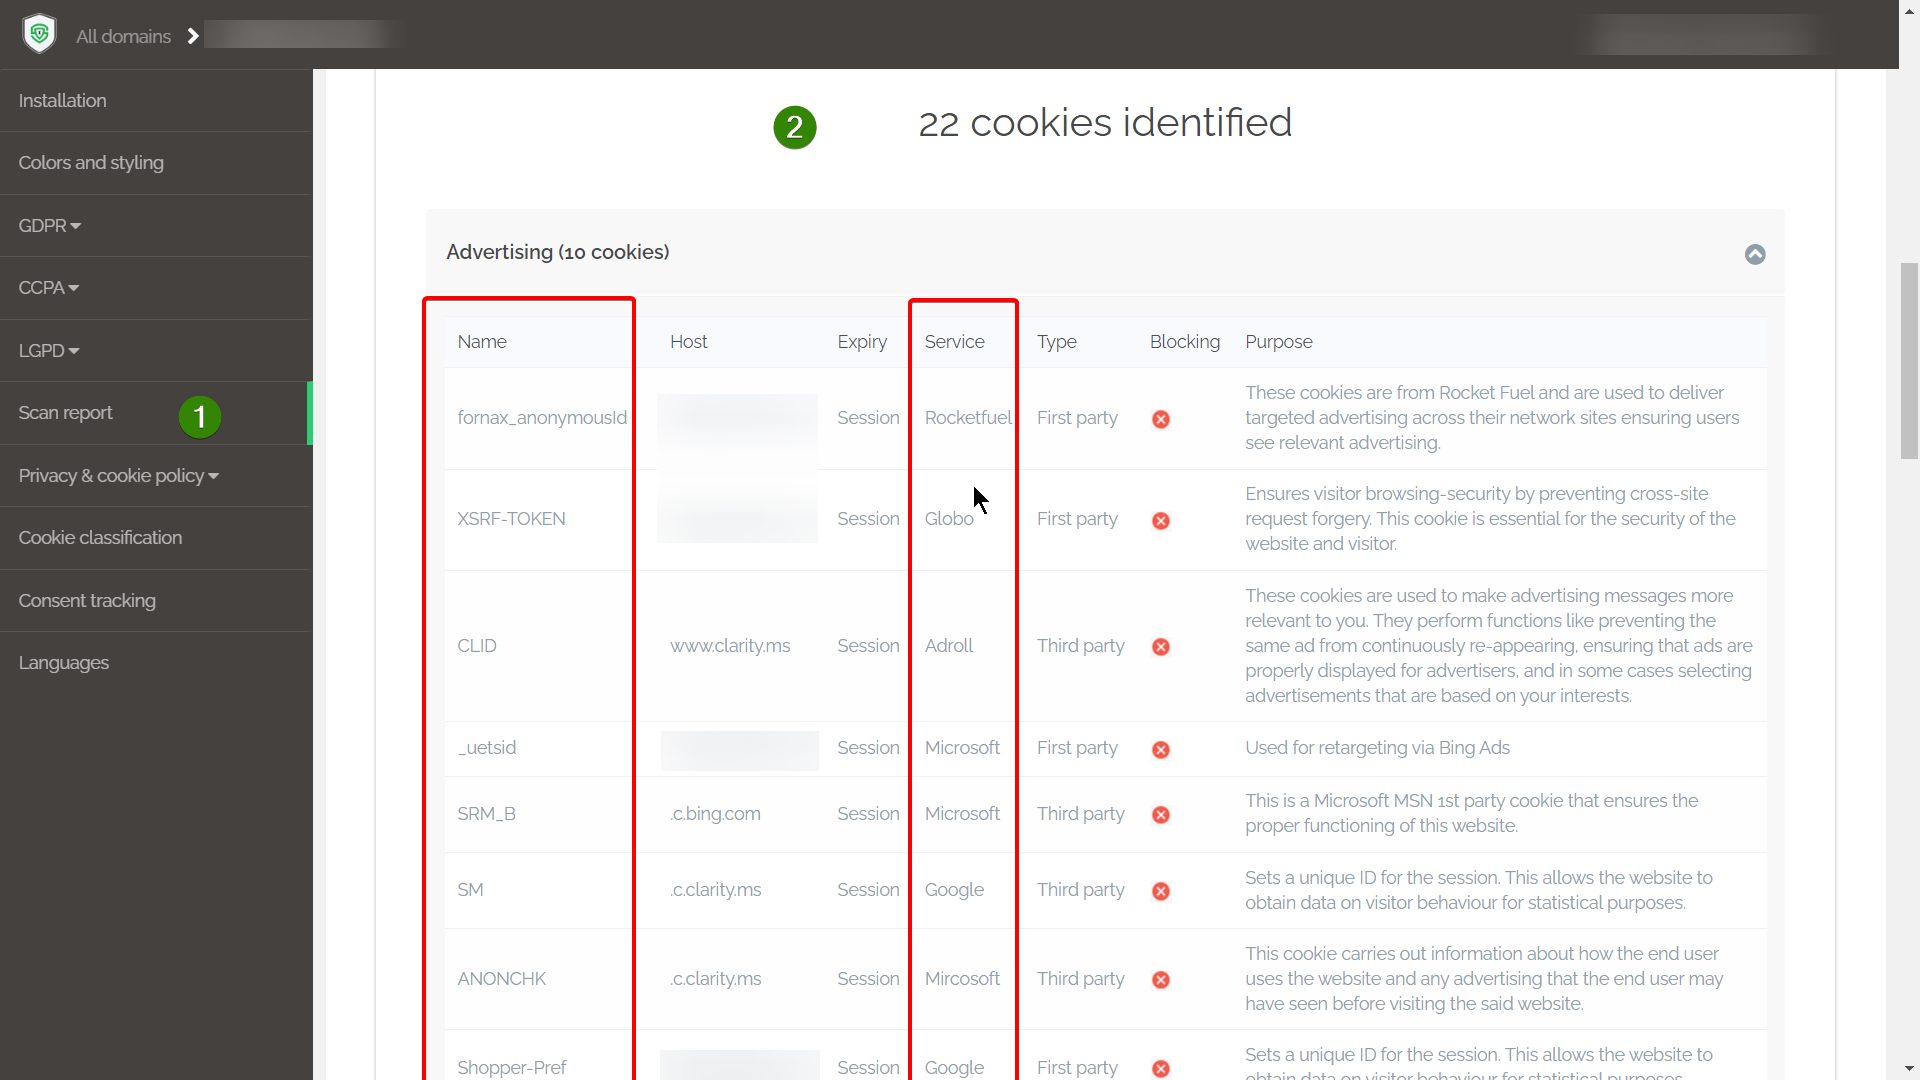
Step 1: Locate Cookies Not Blocked Automatically
Go to the Report page in your Secure Privacy dashboard. Scroll down to the detected cookies section and look for cookies marked with a red X in the Blocking column. These indicate cookies or services that are not currently being blocked automatically and require manual configuration.
Step 2: Identify the Script, Pixel, or iframe Source
Consult your implementation or development team to determine the source script, pixel, or iframe responsible for the unblocked cookie or service. You will need the source URL or domain associated with the service to configure blocking in the next step.
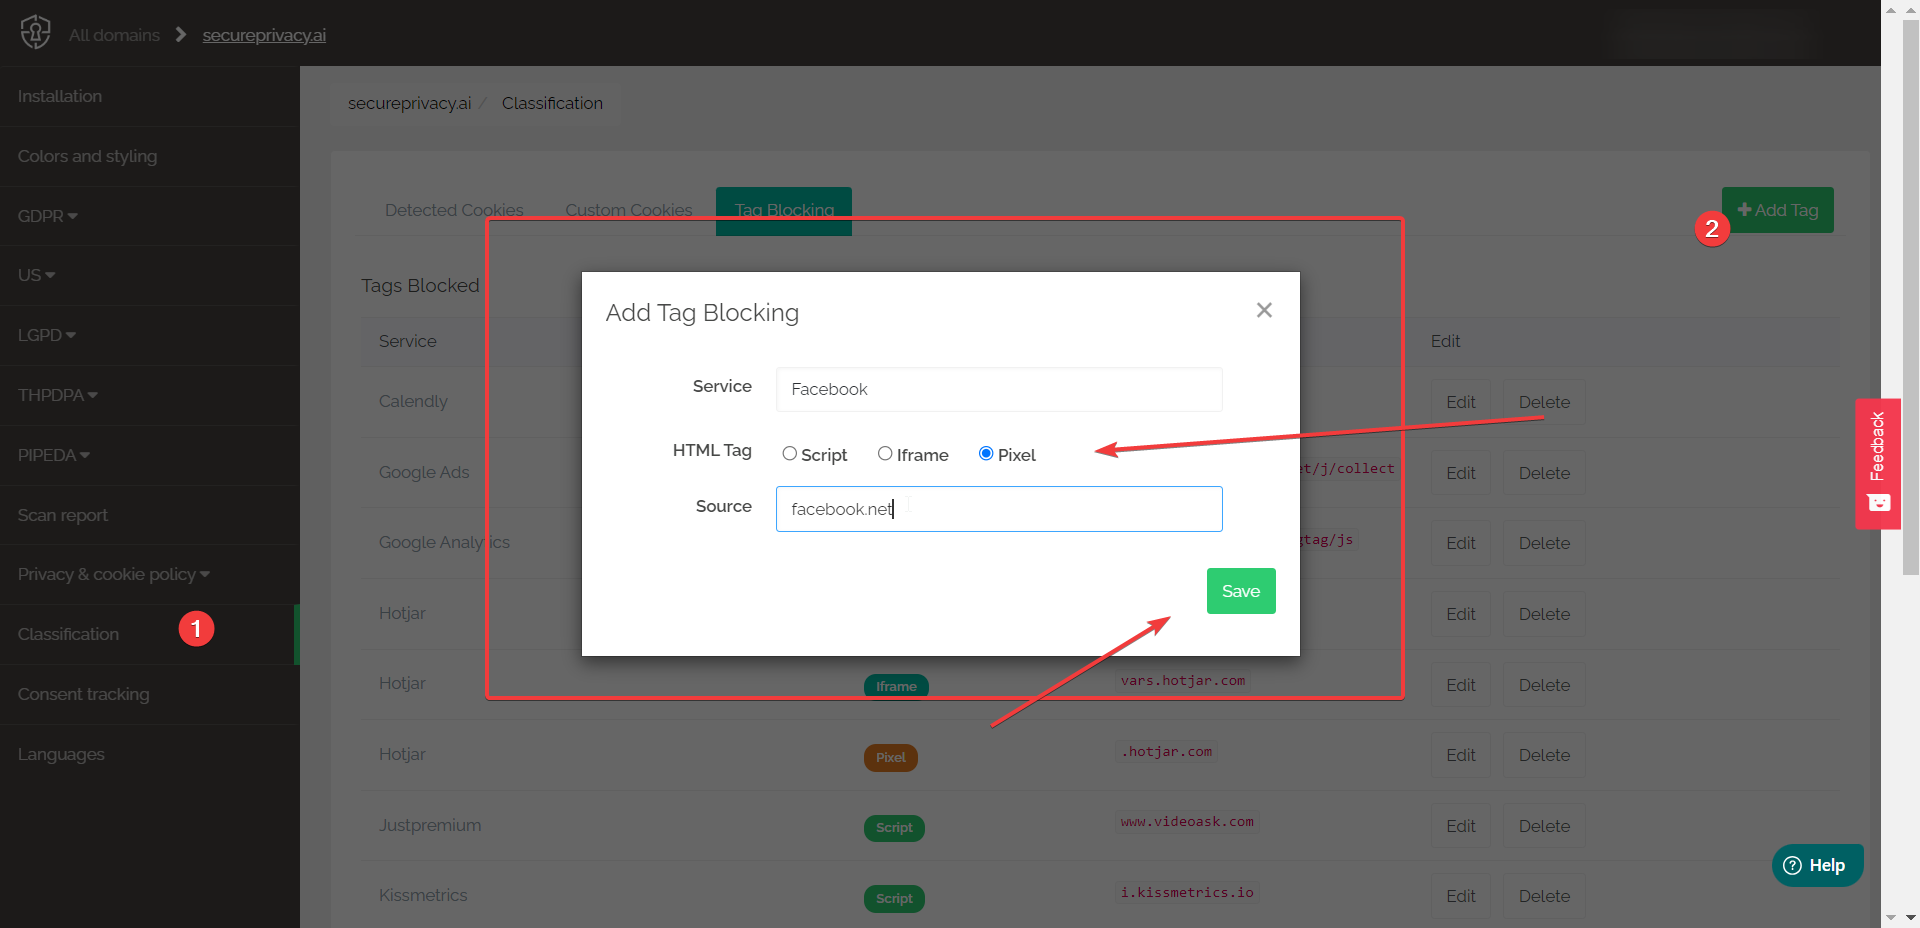
Step 3: Apply Manual Blocking Configuration
In the Secure Privacy dashboard, navigate to Classification > Tag Blocking. Add the service you want to block by specifying:
The type — Script, Iframe, or Pixel
The source URL or domain associated with the service
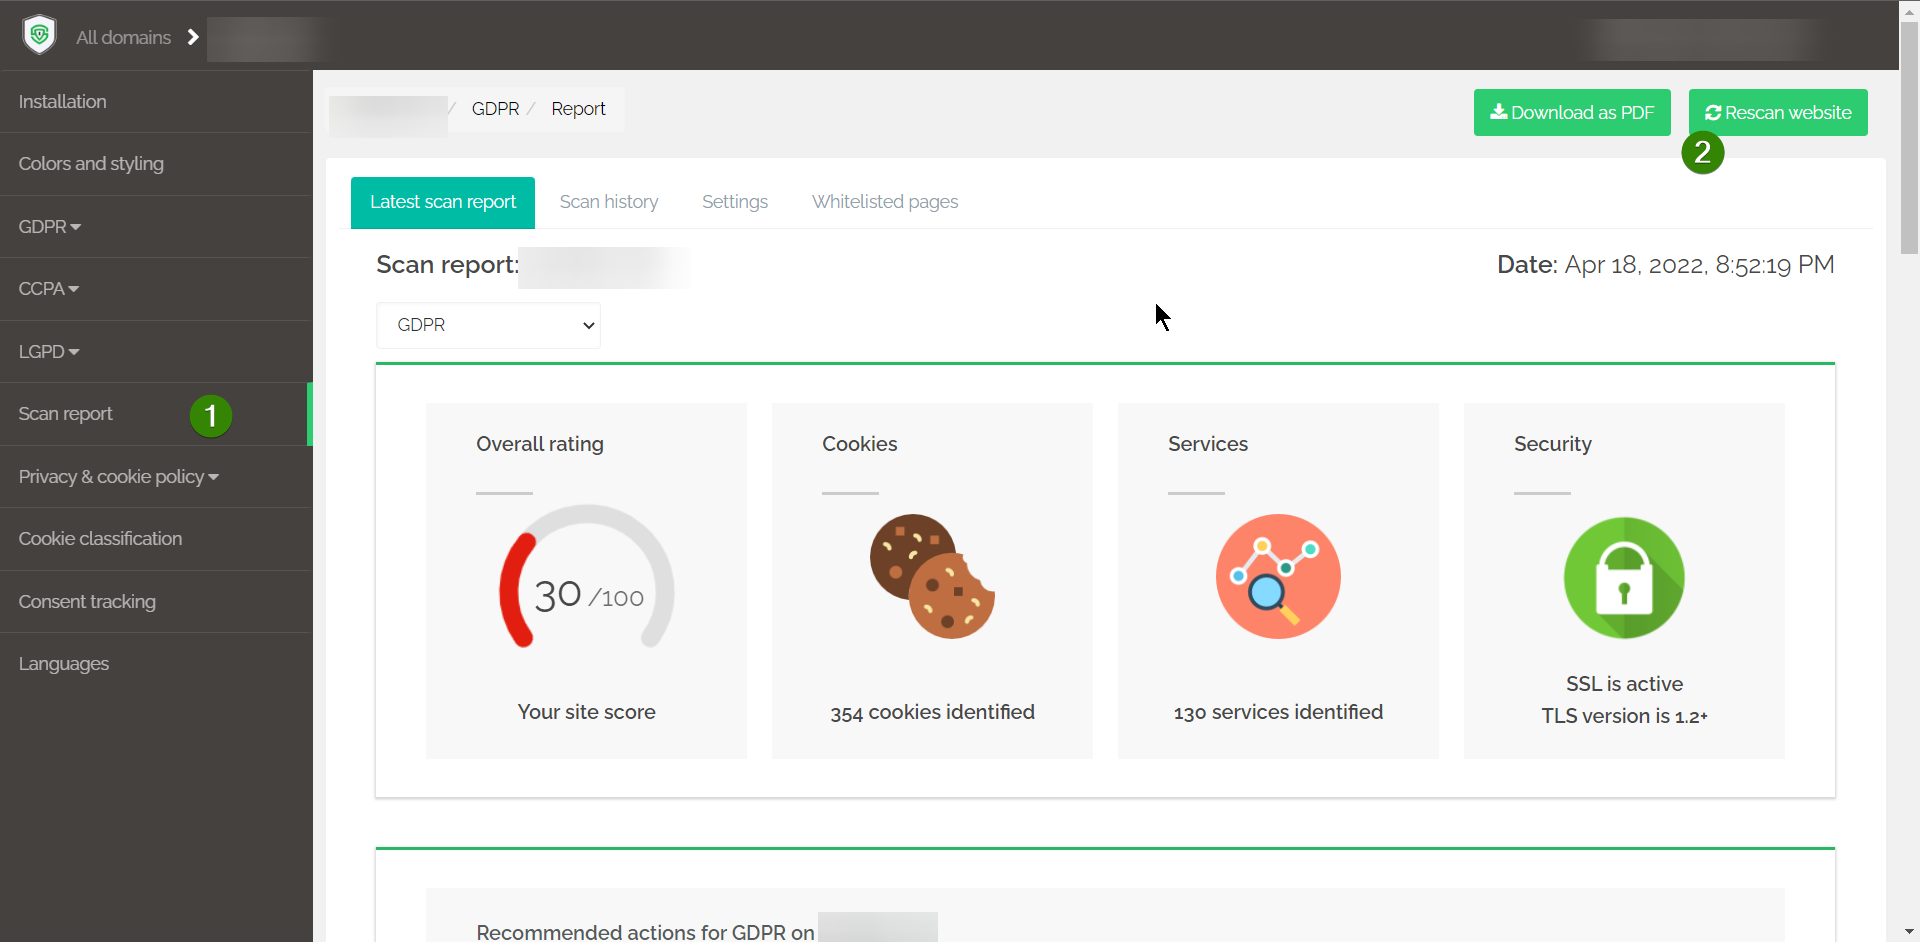
Step 4: Rescan Your Website to Verify Blocking
Once the Tag Blocking configuration is saved, run a website rescan from the Scan Report page. After the scan completes, check whether the previously unblocked service now shows as successfully blocked in the Blocking column.
Summary
Identify unblocked cookies by looking for red X indicators in the Blocking column of your Scan Report.
Find the related script, pixel, or iframe source responsible for the unblocked service.
Manually configure blocking for that source in Classification > Tag Blocking.
Rescan your website to confirm the service is now successfully blocked.
Frequently Asked Questions
Why are some cookies not blocked automatically by Secure Privacy?
Secure Privacy's auto-blocking engine covers the majority of commonly detected scripts and services. However, some cookies may not be automatically blocked due to non-standard script implementations, custom-built tracking solutions, or services that Secure Privacy has not yet detected and classified for your specific website setup. Manual Tag Blocking allows you to close these gaps.
What information do I need to add a service to Tag Blocking?
You need to know the type of tag — Script, Iframe, or Pixel — and the source URL or domain associated with the service. Your development or implementation team can usually identify this from the page source or network requests visible in the browser's developer tools.
How long does a rescan take, and when should I run it?
Rescan times vary depending on website size and complexity. Run the rescan after saving your Tag Blocking configuration to verify the service is now blocked. If the red X is still showing after the rescan, double-check that the source URL or domain entered in Tag Blocking exactly matches the one identified in the scan report.