The Data Request Form in Secure Privacy allows visitors to submit GDPR, CCPA, and LGPD data subject rights requests directly from your website. This guide covers all available customization options — from renaming the form tab and editing control element text through to configuring notification messages, email templates, and enabling or disabling the form entirely.
Who Is This For?
Privacy officers and compliance teams customizing the Data Request Form for their organization's legal requirements
Website administrators enabling and configuring DSAR form settings in Secure Privacy
Developers managing form control elements, validation, and automated email templates
How to Rename the Data Request Form Tab Title
Log in to your Secure Privacy account and select GDPR, CCPA, or LGPD from the left sidebar as applicable.
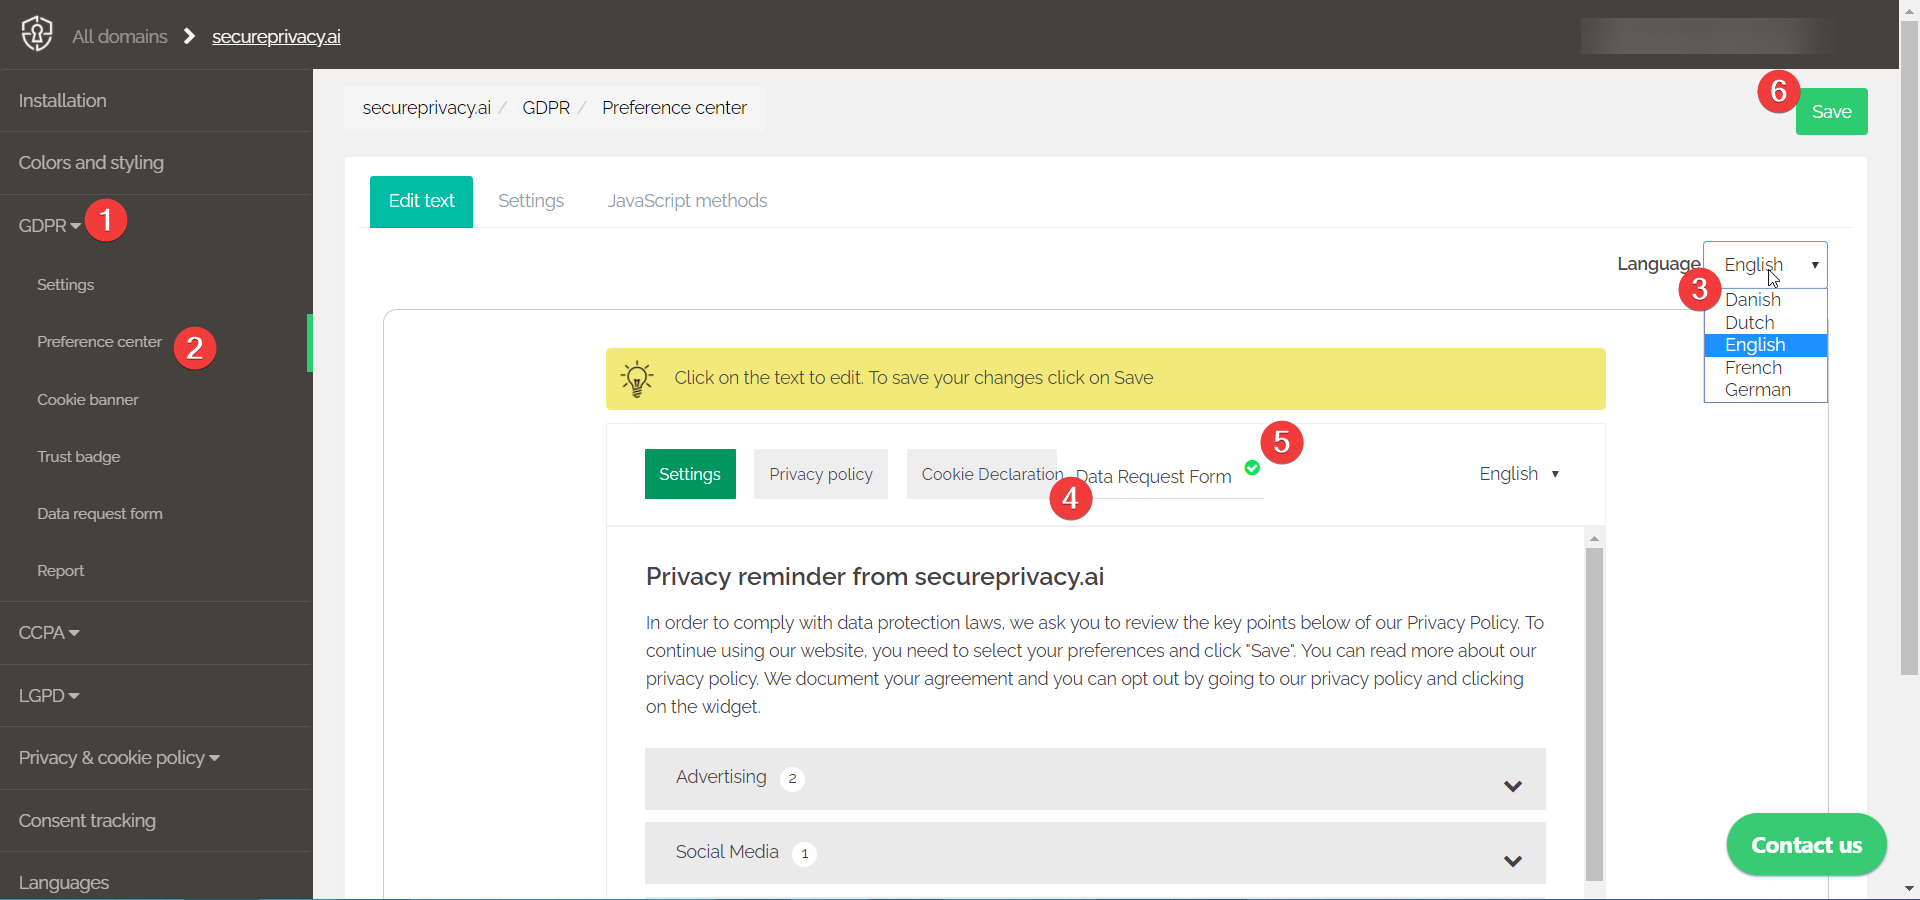
Click Preference Center — you will be taken to the Edit Text tab.
Select the Language you want to edit from the drop-down menu.
Click the Data Request Form tab to switch into edit mode and update the tab title text to match your legal requirements.
Click the green tick (above and to the right of the edited text) to apply the change.
Click Save.
How to Edit Text Content on Form Control Elements
Log in to your Secure Privacy account and select GDPR, CCPA, or LGPD from the left sidebar.
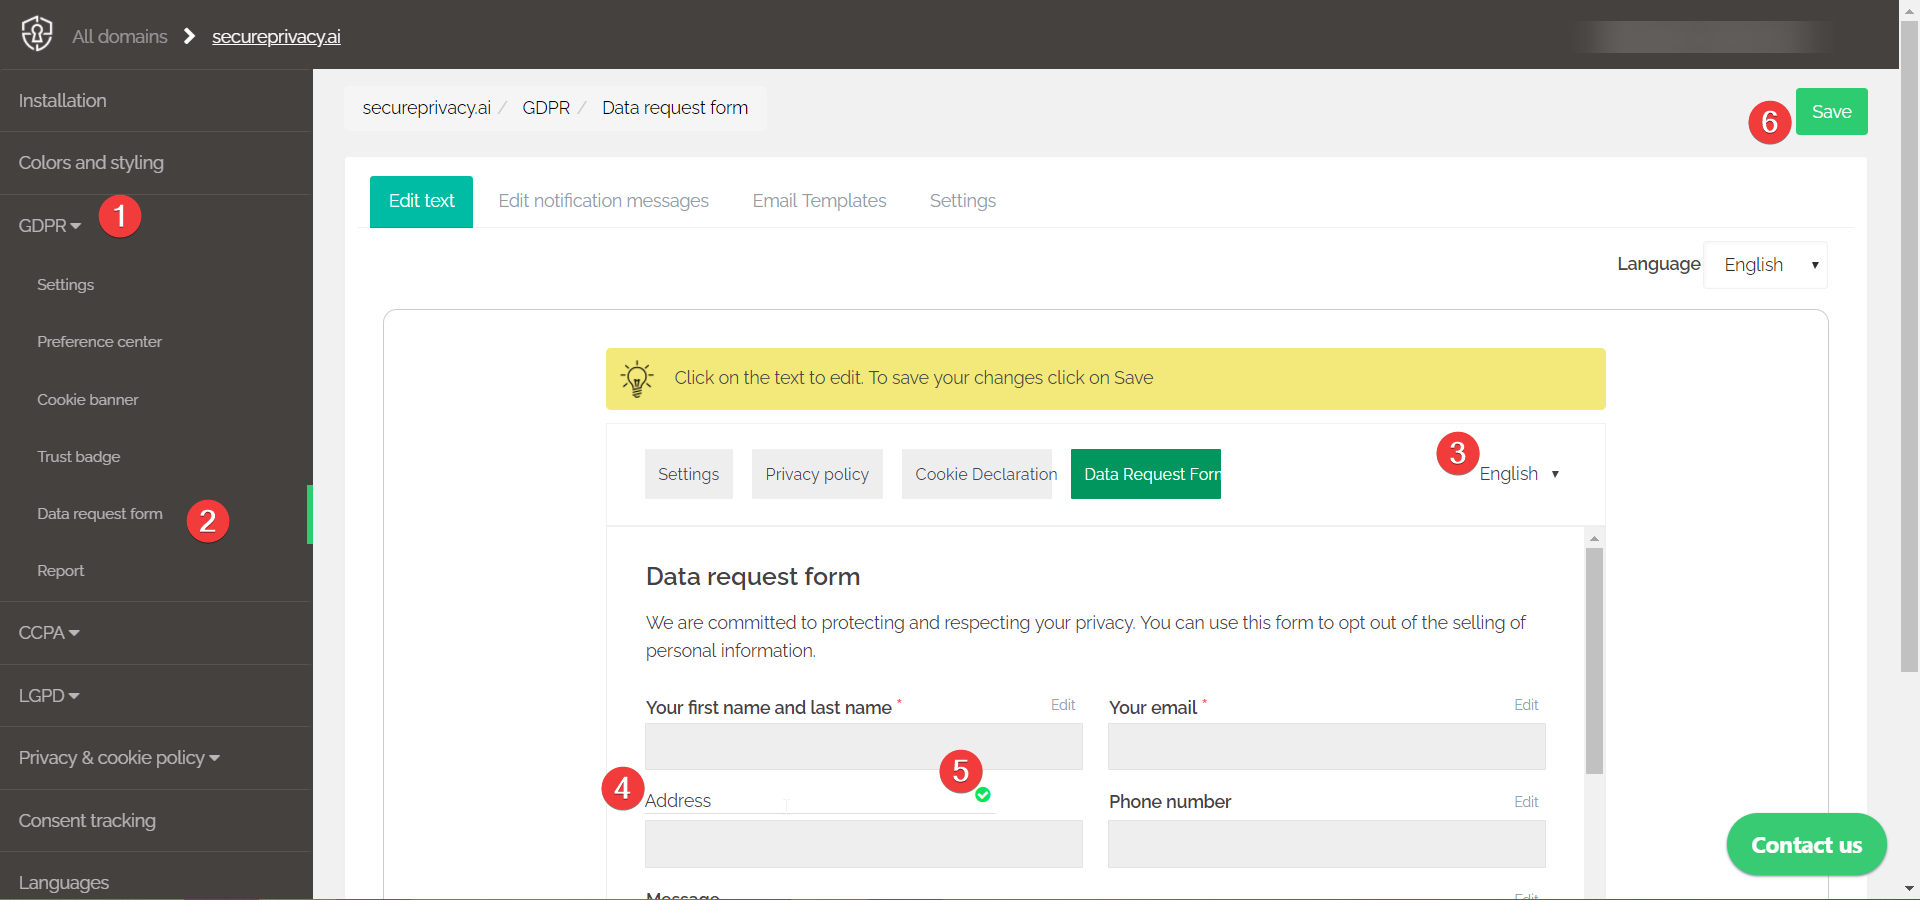
Click Data Request Form — you will be shown the Edit Text tab.
Select the Language you want to edit from the drop-down menu.
Click any control element to switch into edit mode and update the text to match your legal requirements.
Click the green tick to apply the change to that element.
Click Save when you have finished all edits.
How to Edit or Delete a Control Element on the Data Request Form
Log in to your Secure Privacy account and select GDPR, CCPA, or LGPD from the left sidebar.
Click Data Request Form — you will be shown the Edit Text tab.
Select the Language from the drop-down menu.
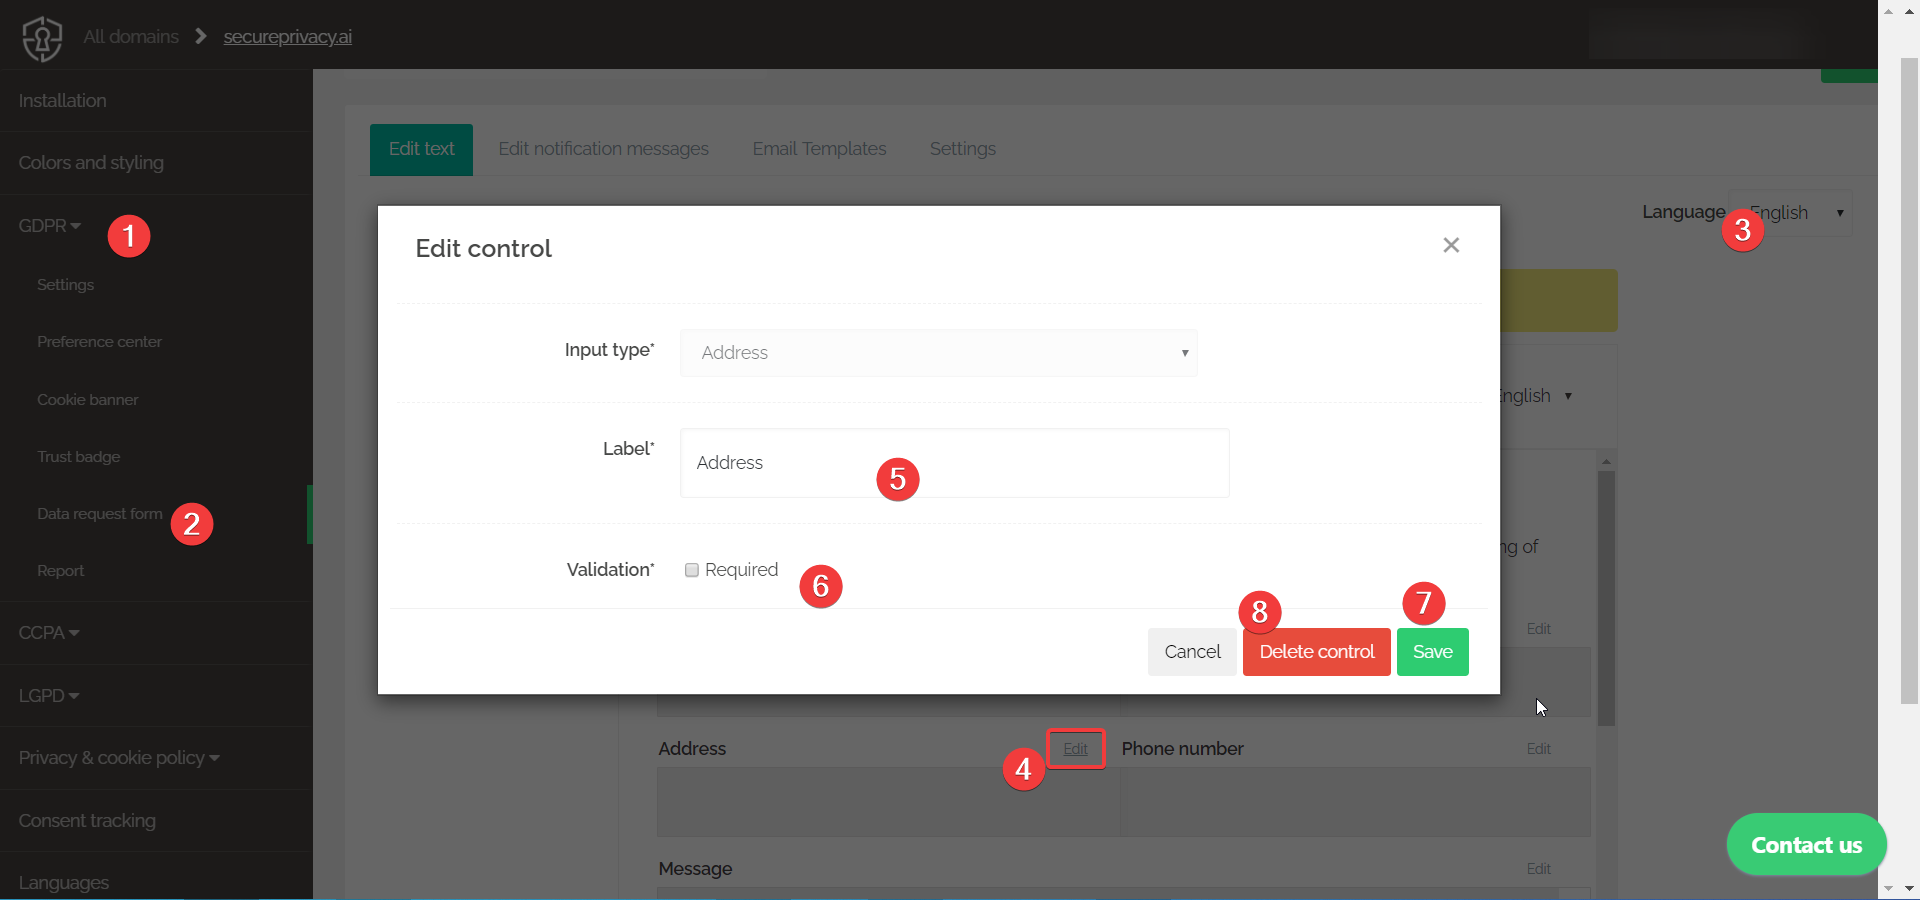
Click the Edit link on any control element to open the Edit Control modal window.
Update the Label text to match your legal requirements.
Use the Validation option to make the field Required — the form will not submit until the visitor completes this field.
Click the green Save button to apply your changes.
To remove the field entirely, click the red Delete control button.
How to Modify Notification Messages for the Data Request Form
Log in to your Secure Privacy account and select GDPR, CCPA, or LGPD from the left sidebar.
Click Data Request Form — you will be shown the Edit Text tab.
Click the Edit notification messages link.
Select the Language you want to edit from the drop-down menu.
Update any notification message text to match your requirements.
Click the green Save button to apply your changes.

How to Enable or Disable the Data Request Form
Log in to your Secure Privacy account and select GDPR, CCPA, or LGPD from the left sidebar.
Click Data Request Form — you will be shown the Edit Text tab.
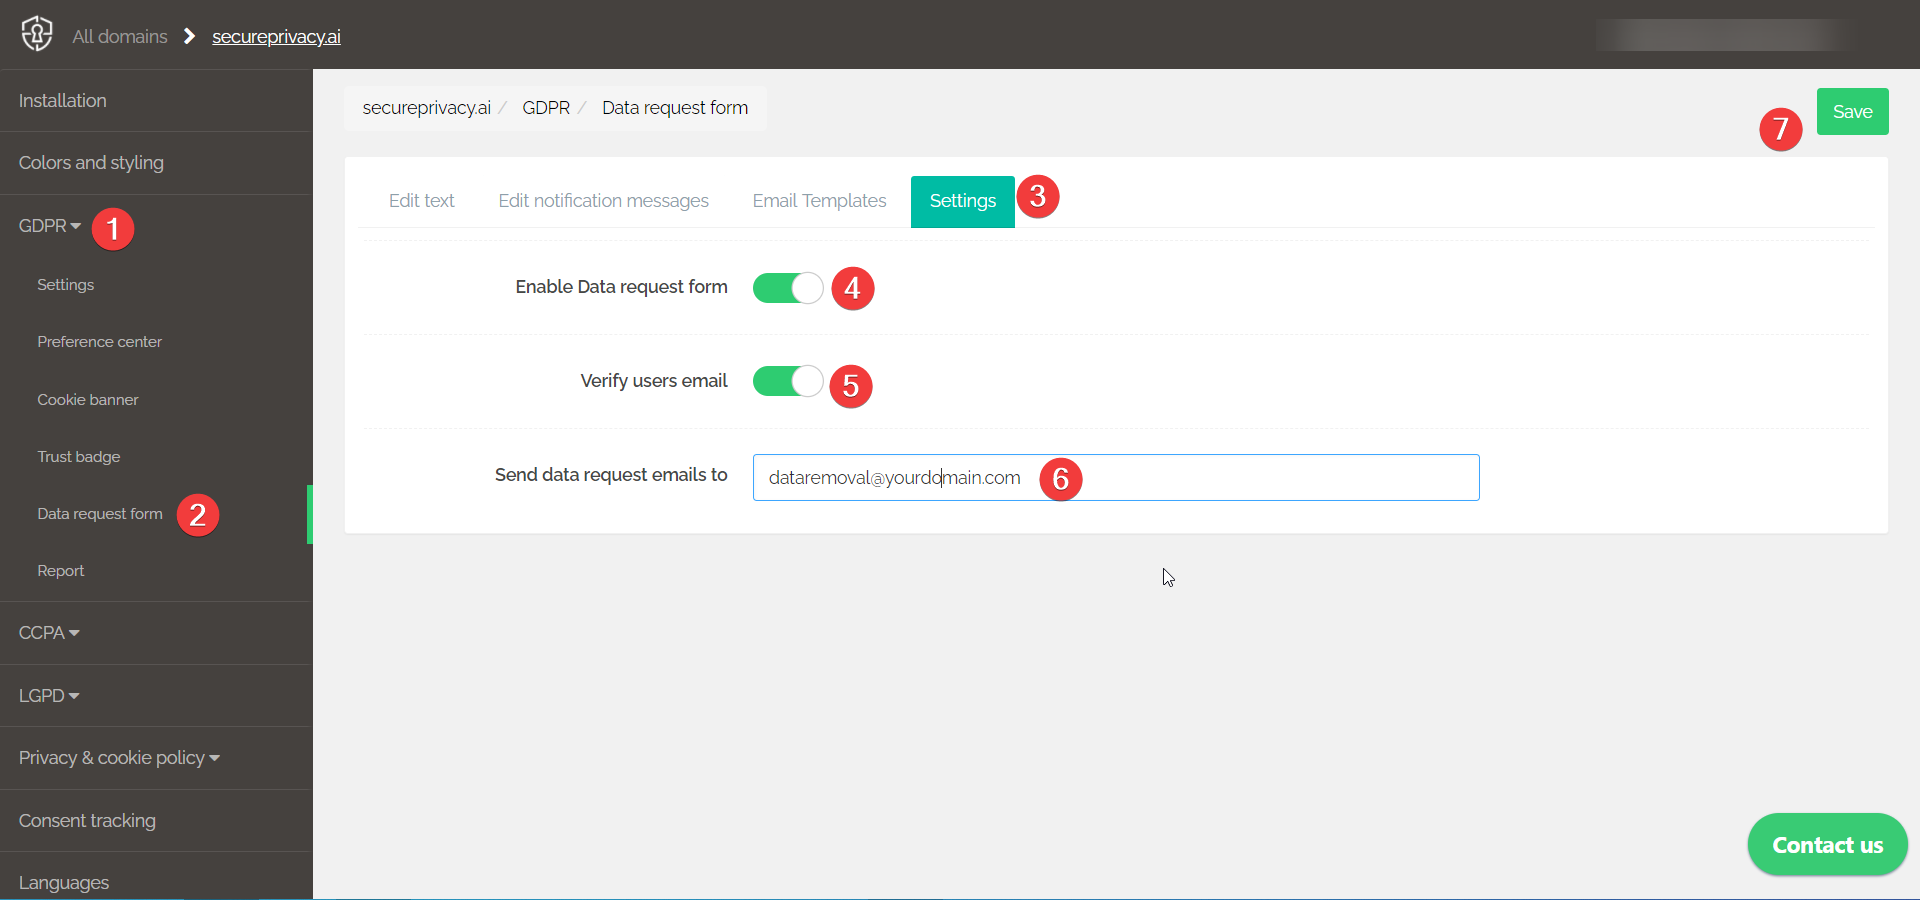
Click the Settings link to access configurable parameters for your form.
Use the Enable Data Request Form toggle to enable or disable the form for your domain.
Enable Verify users email to require visitors to confirm their email address before the request is submitted — this helps verify the requester's identity.
Set Send data request emails to to the email address of the person in your organization who processes data export, removal, and other requests.
Click the green Save button to apply your changes.
How to Customize Automated Emails Sent to Data Request Form Submitters
Log in to your Secure Privacy account and select GDPR, CCPA, or LGPD from the left sidebar.
Click Data Request Form — you will be shown the Edit Text tab.
Click the Email Templates link.
Select the Language you want to edit from the drop-down menu. Note: The page includes field template placeholders you can insert to personalize email content.
Edit the Request received template to customize the email sent to your company when a data request is submitted, including the data provided by the requester.
Edit the User verification template to customize the email verification message sent to the visitor to confirm their identity before the request is processed.
Click the green Save button to apply your changes.
Frequently Asked Questions
Can I configure the Data Request Form differently for GDPR, CCPA, and LGPD?
Yes. Each compliance module — GDPR, CCPA, and LGPD — has its own Data Request Form configuration. Navigate to the relevant module from the left sidebar and configure the form, control elements, notification messages, and email templates independently for each regulation.
Can I make specific form fields mandatory?
Yes. When editing a control element, use the Validation option to set it as Required. The form will not submit until the visitor completes all required fields — useful for ensuring you receive the information needed to process the request.
What is the difference between the "Request received template" and the "User verification template"?
The Request received template is the email sent to your organization when a data request is submitted — it contains the request details provided by the visitor. The User verification template is the email sent to the visitor containing an identity verification link, which they must click to confirm their identity before the request is processed.