This article provides a concise and easy-to-follow guide on how to set up Single Sign-On (SSO) using Microsoft / Azure platform. It’ll enable administrators to manage users and their access to multiple applications using a single login.
Setting up Microsoft Entra ID (formerly “Azure Active Directory”) integration
Accomplish seamless integration and SSO configuration with Microsoft Entra ID by following the systematic guide discussed. Microsoft Entra ID, formerly known as Azure Active Directory, aids in streamlining the user authentication across multiple apps and devices.
TABLE OF CONTENTS
- Setting up Microsoft Entra ID (formerly “Azure Active Directory”) integration-integration)1. Locate your Tenant ID in Azure
- 2. Create and setup an Enterprise Application in Azure / Microsoft Entra ID
- 3. Ensure correct permissions of the Application are presentGo to the API permission page of the SSO Application, make sure you have the following permissions provided to Microsoft Graph API - Delegated permissions
- Additionally, make sure they are granted with Admin consent:
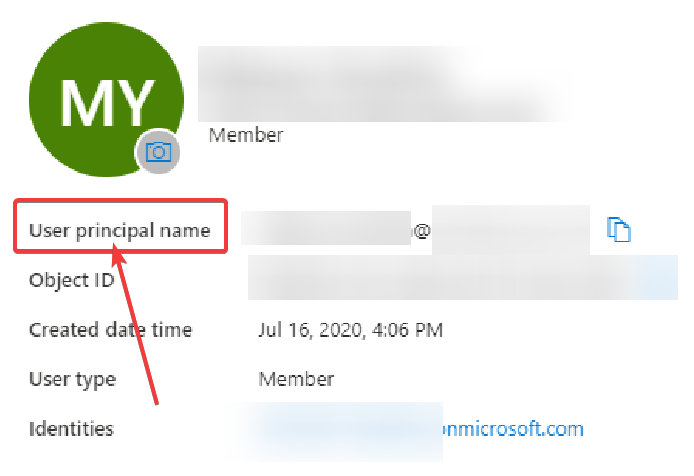
- Make sure your Secure Privacy account uses the User Principal Name in your Azure organization as an email.
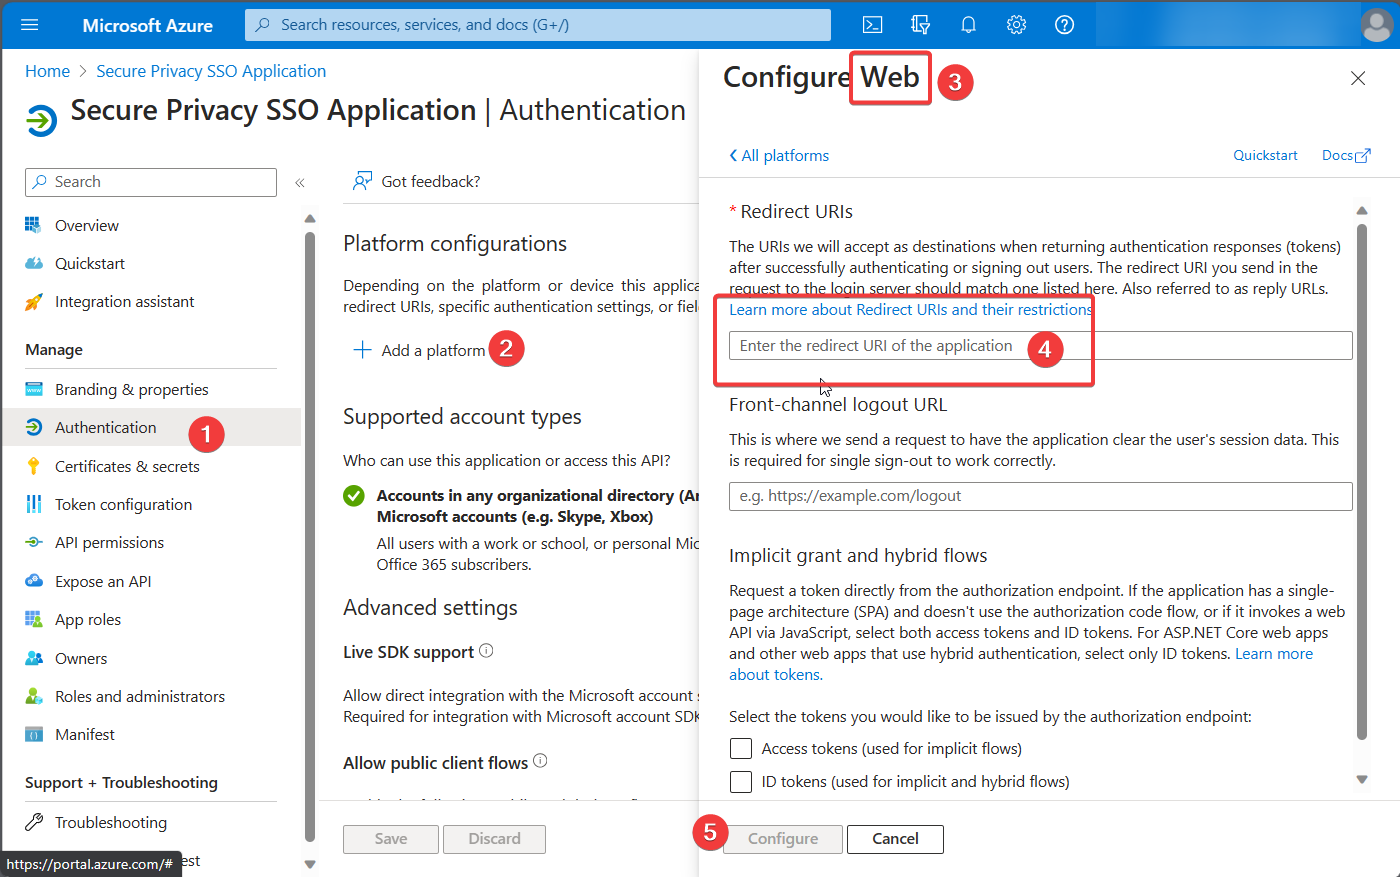
- Setup redirect URI on the Authentication page
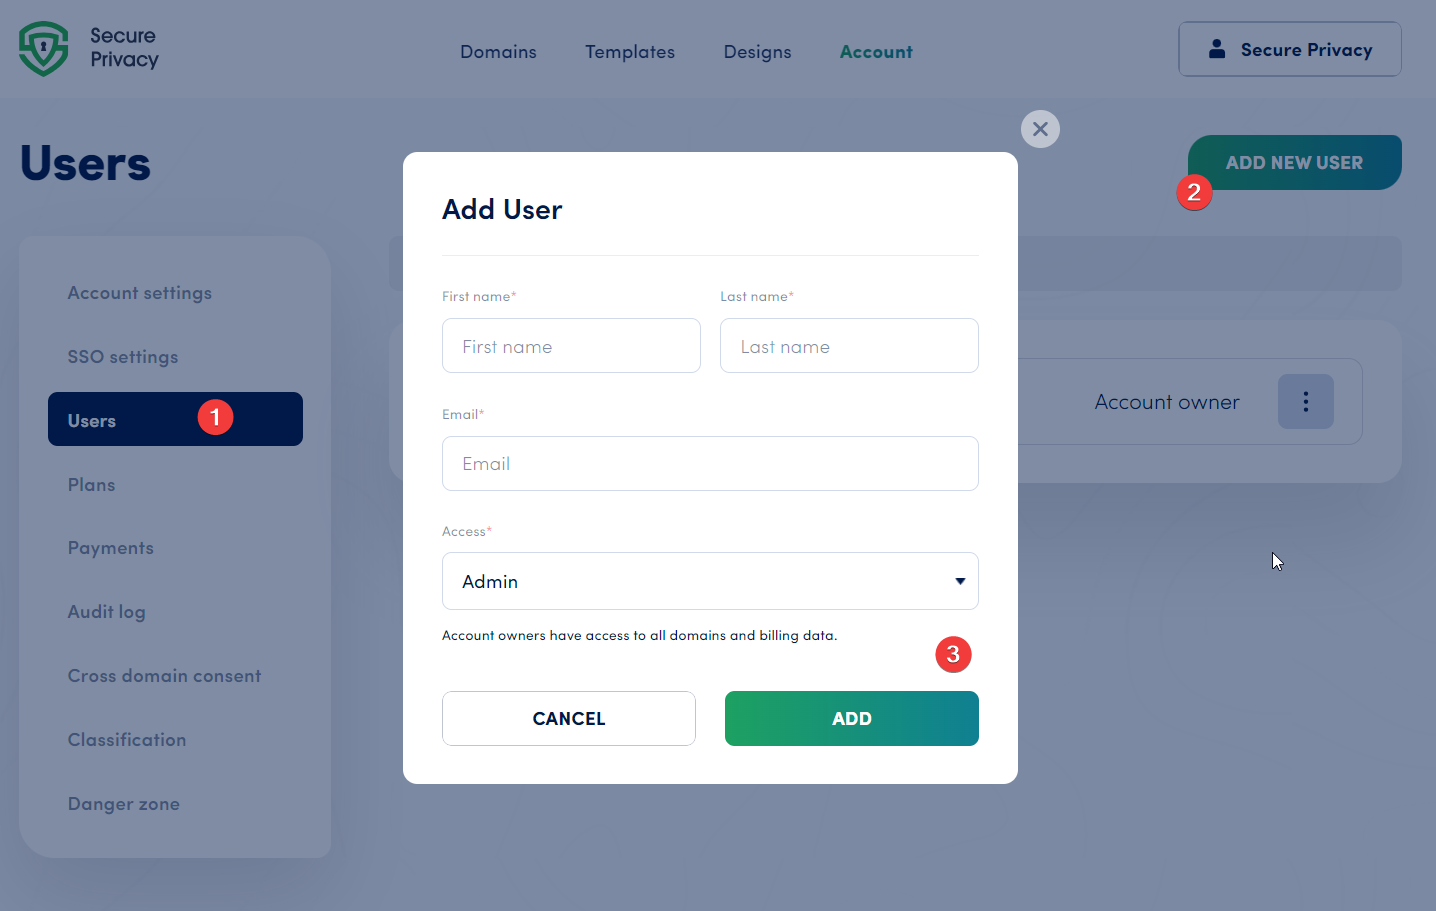
4. Create Client secret for the SSO application5. Done! Add users from your organization on Users page of Secure PrivacyYour added Azure users can login into Secure Privacy using Microsoft now!
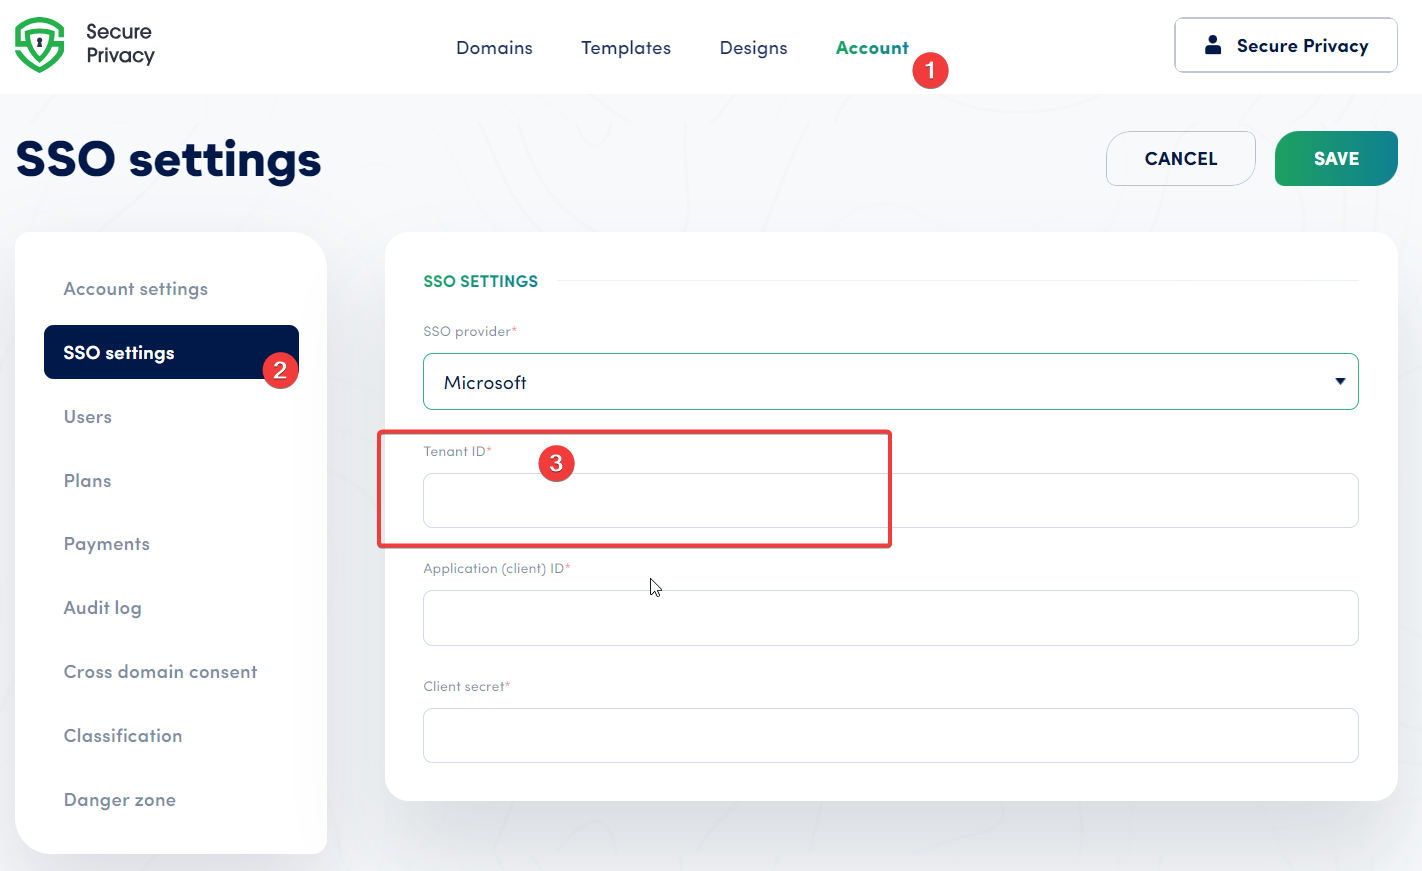
1. Locate your Tenant ID in Azure
- From the Azure Home page, use search bar for "Microsoft Entra ID"

then copy/paste the Tenant ID on this page here -
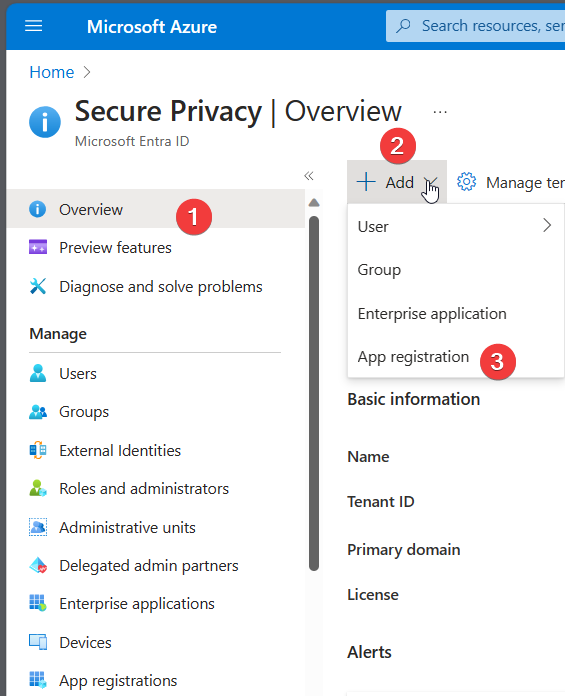
2. Create and setup an Enterprise Application in Azure / Microsoft Entra ID
- From the Azure Home page, use search bar for "Microsoft Entra ID", then click "Add" -> "App registration"
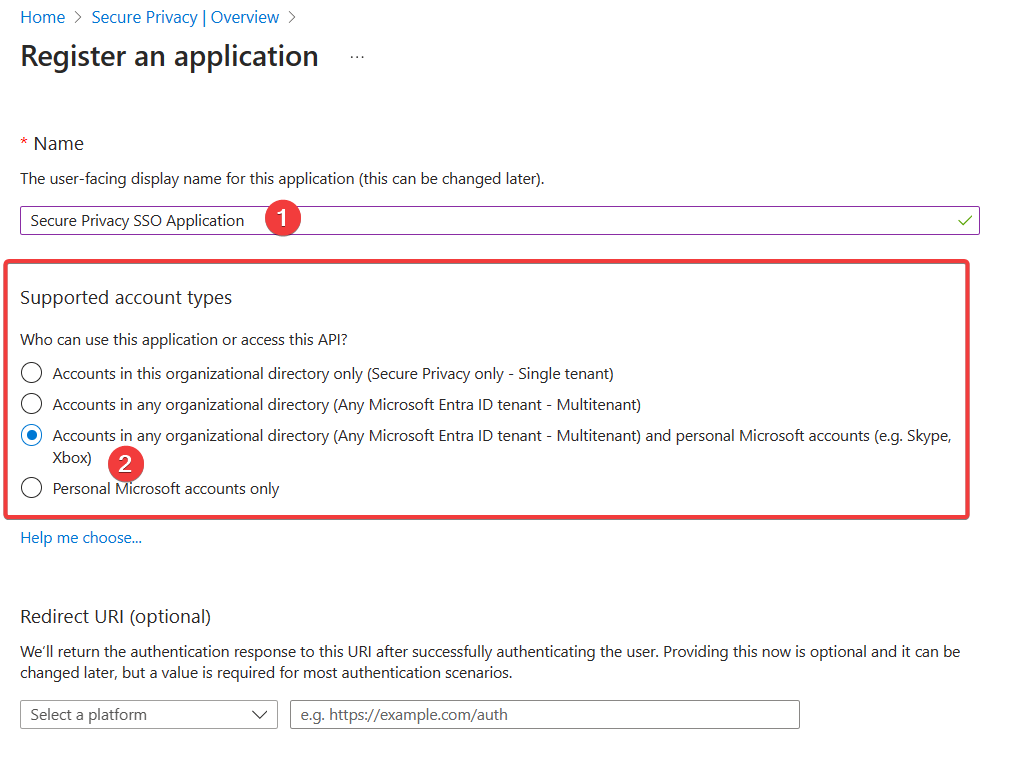
- Proceed with the setup wizard popup, type in the Name of this SSO Application (can be changed later if needed),
make sure to select the following account type:
- Once created - you will be redirected to the application's landing page,
please locate your "Application (client) ID" of this application here -
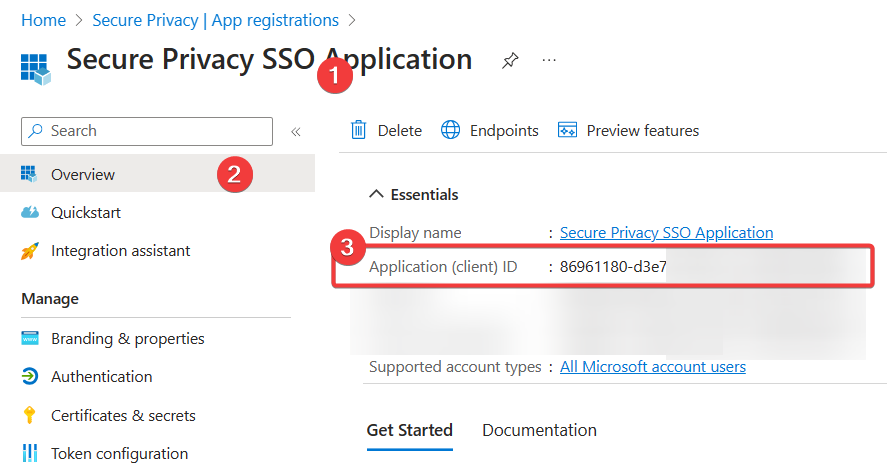
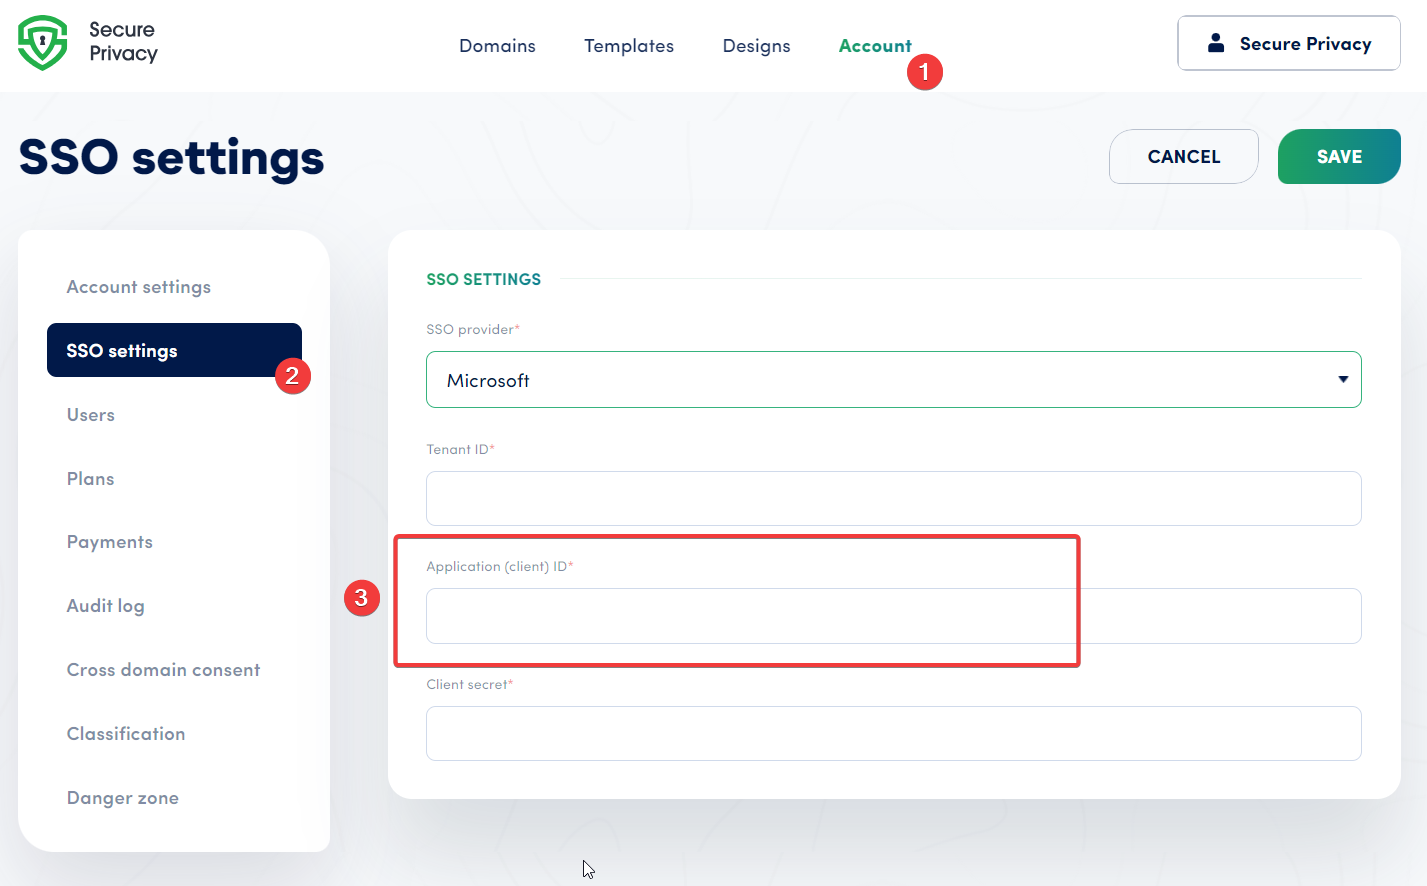
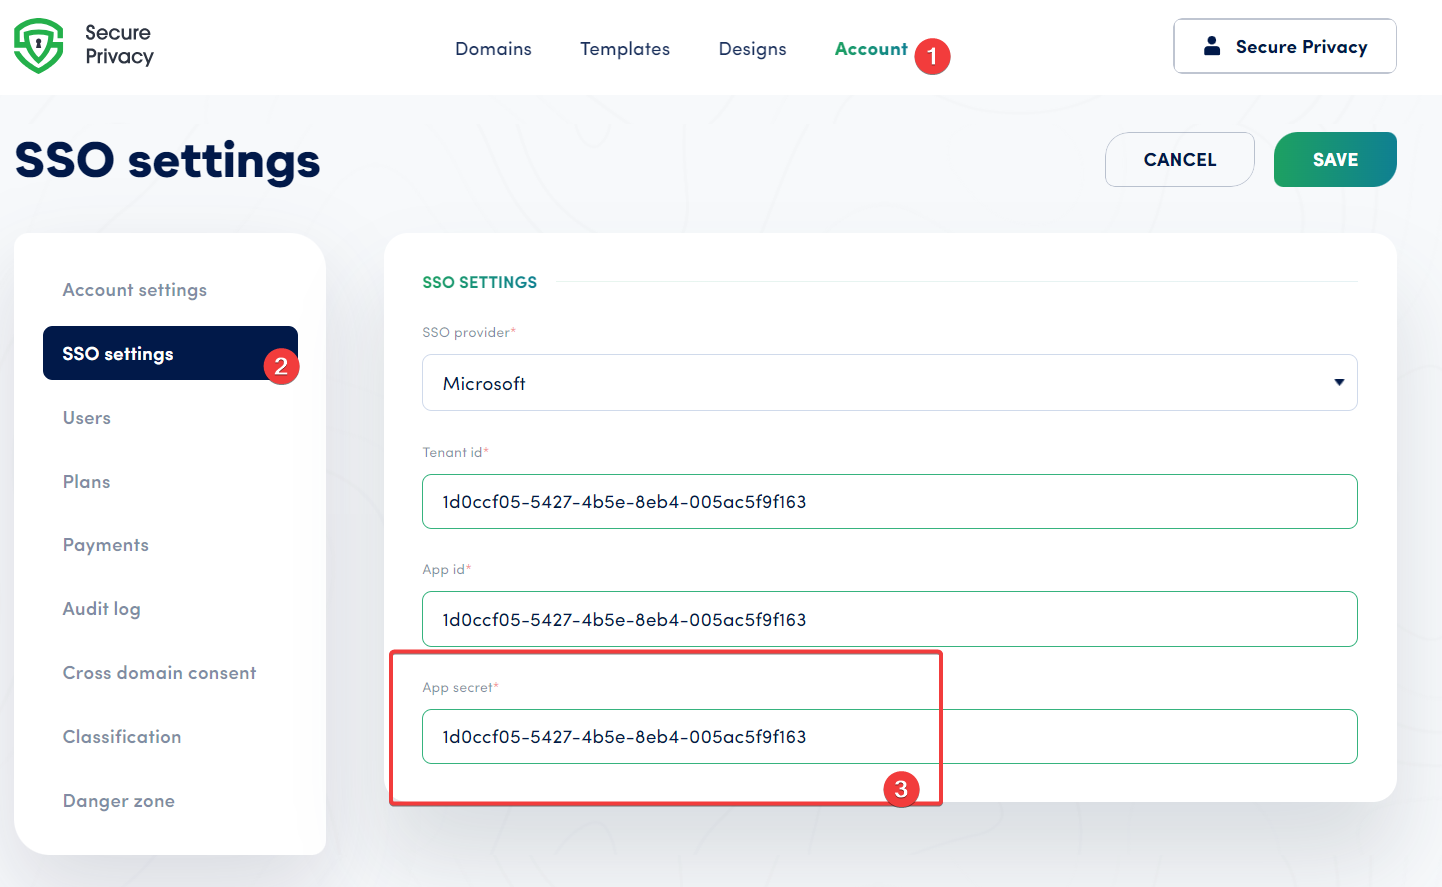
then copy / paste this value to the SSO settings page in your Secure Privacy Account
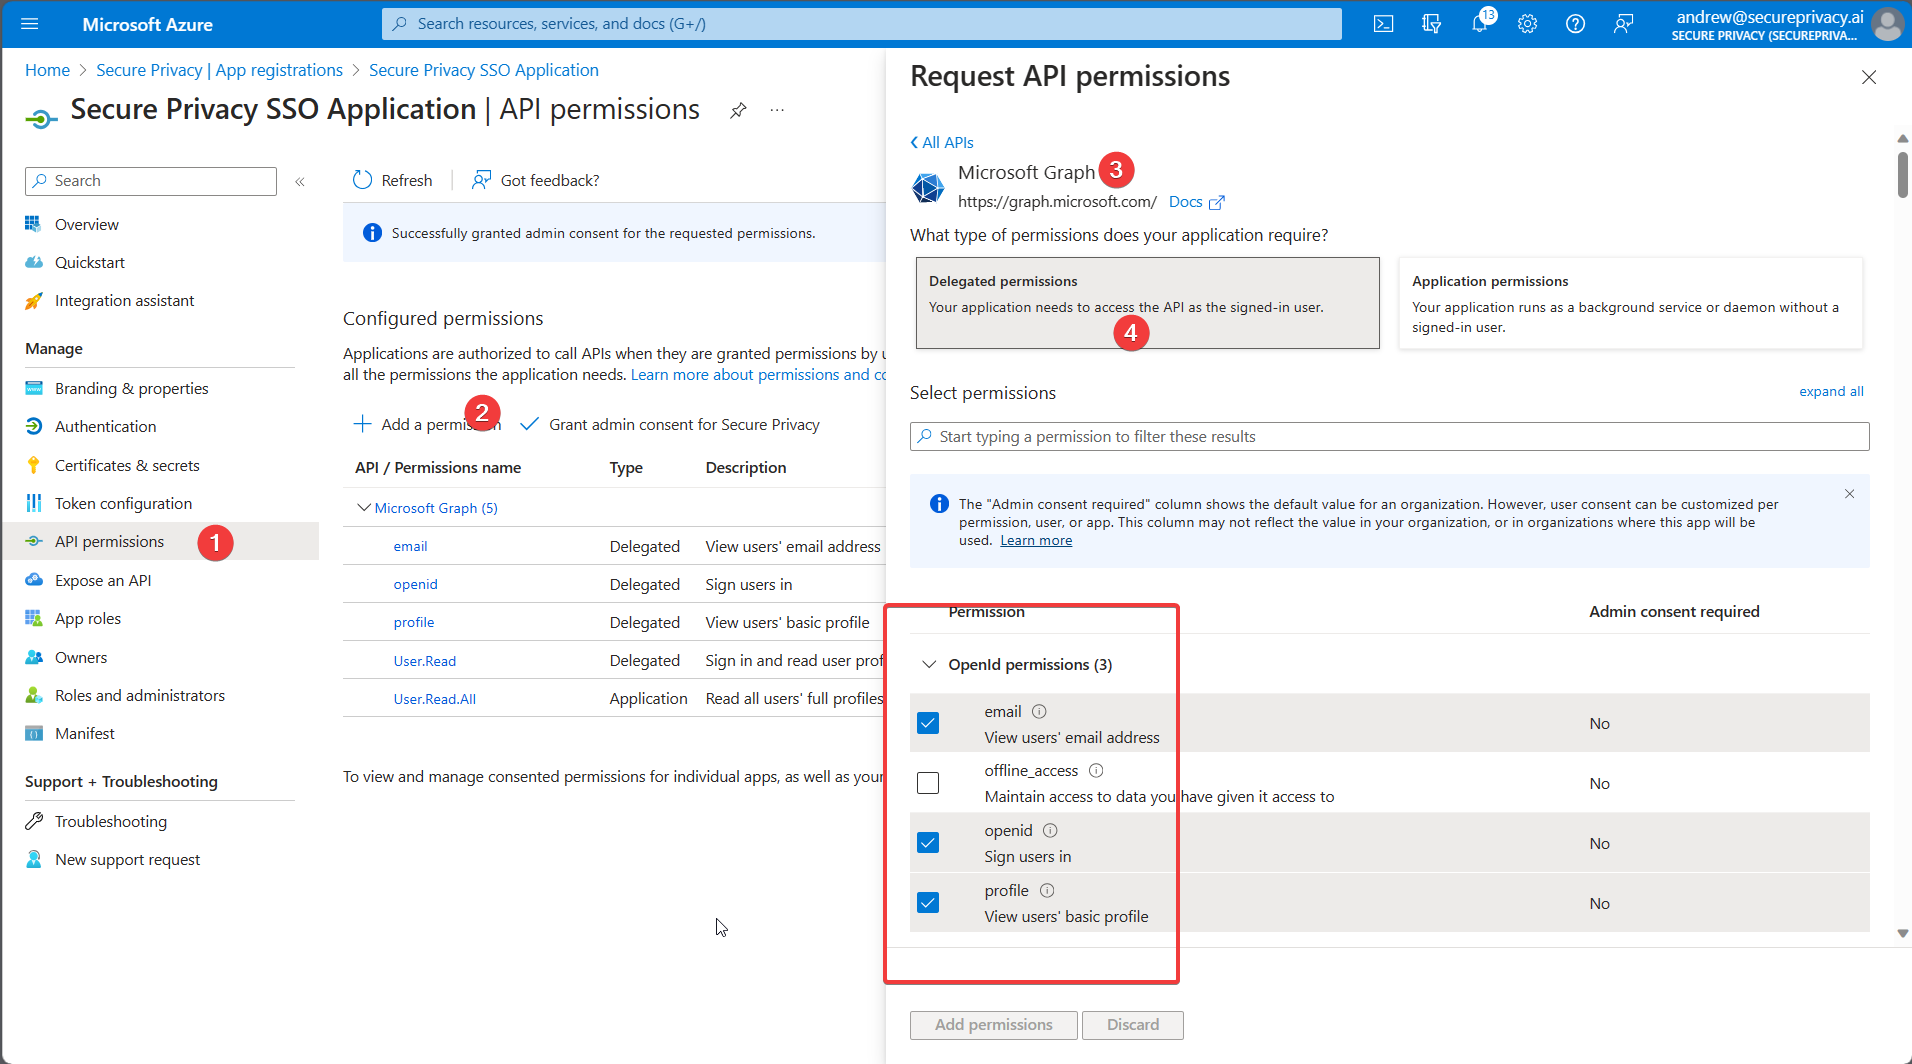
3. Ensure the correct permissions of the Application are present
- Go to the API permission page of the SSO Application, make sure you have the following permissions provided to the Microsoft Graph API- Delegated permissions
- openid
- profile
- Application permissions
- User.Read.All
- Additionally, make sure they are granted with Admin consent:
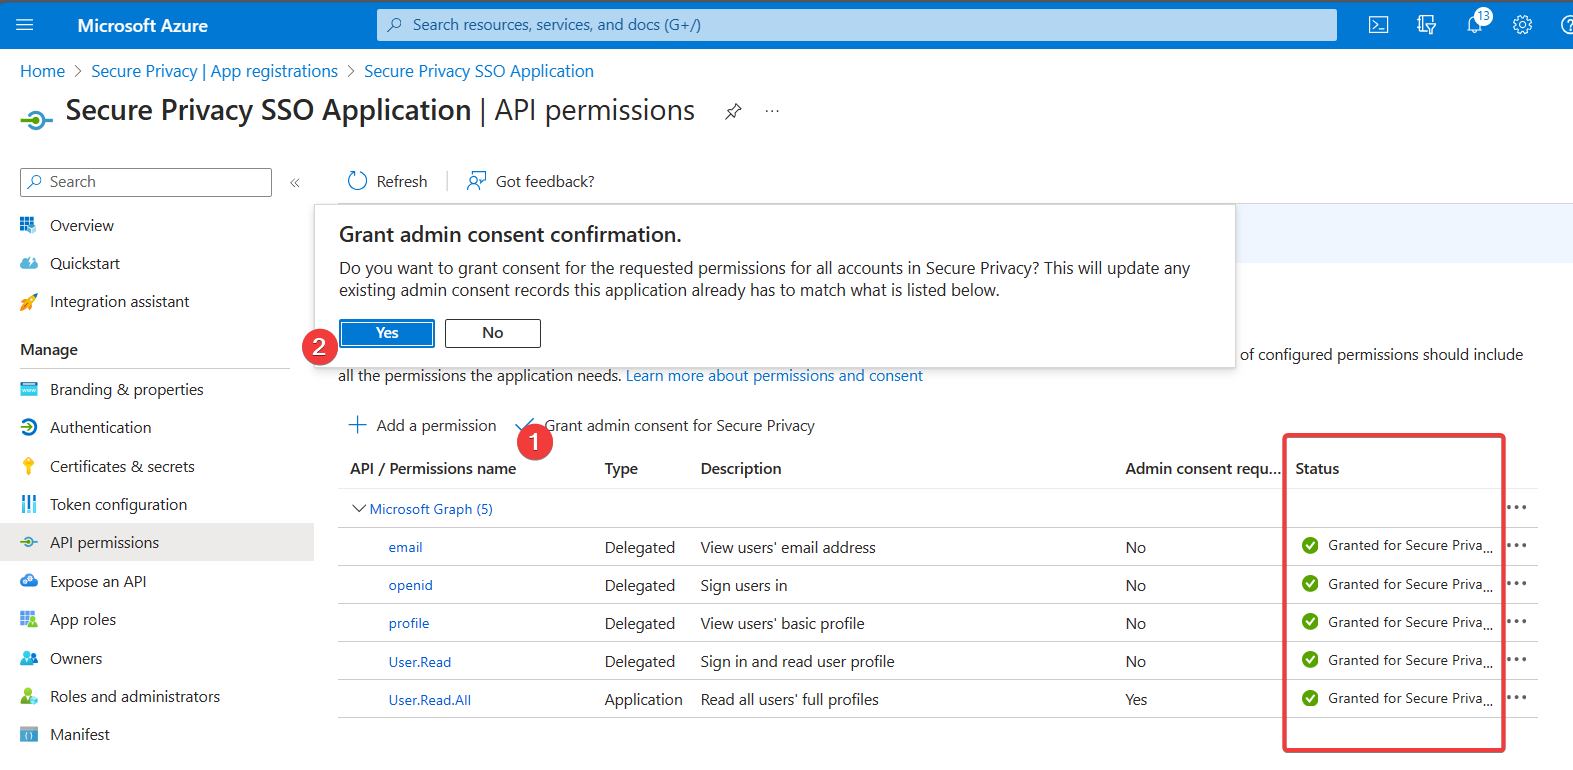
If you are not able to grant admin consent, ask your Global Admin a permission from your organization.
- Make sure your Secure Privacy account uses the User Principal Name in your Azure organization as an email.
This is required for the user who adds SSO settings in Secure Privacy, and for the user being added from the Users page. Please note, such emails should NOT contain "EXT"
- Setup the redirect URI on the Authentication page
Use "Web" as a platform, and then add https://cmp.secureprivacy.ai/ as the redirect URI
4. Create a Client secret for the SSO application
Under App Registrations -> Select your SSO application -> Click the "Certificates & secrets" and then "+ New client secret" -> Copy the "Value" of the Client secret right after it was created -
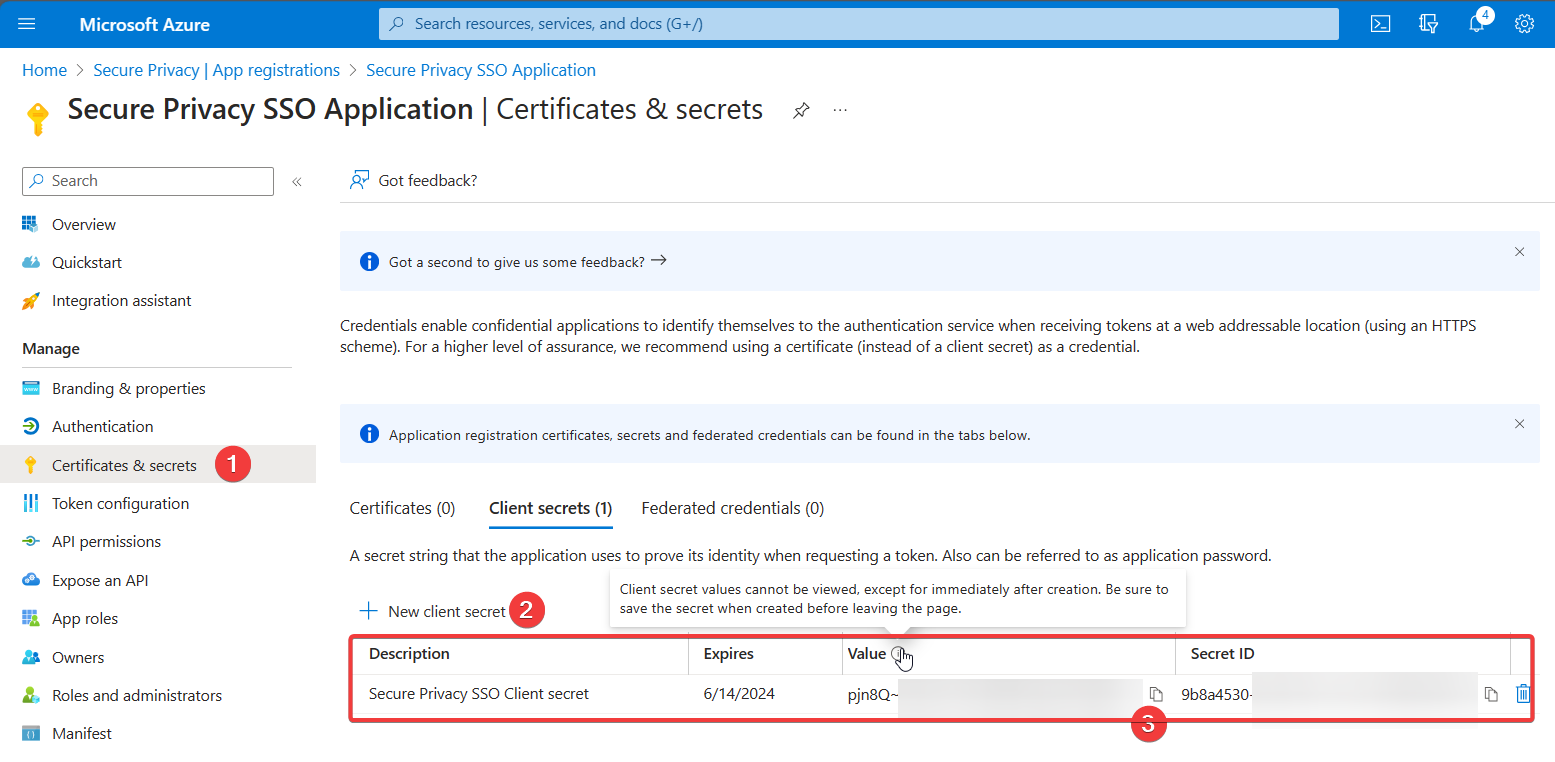
Paste the value into the "Client secret" field in Secure Privacy -
5. Done! Add users from your organization on the Users page of Secure Privacy
Section
###
Your added Azure users can log in to Secure Privacy using Microsoft now!